
http://247lowcarbdiner.blogspot.ca/2011/03/mr-peanut-sandwich-bread.html
Mr. Peanut Sandwich Bread

Who woulda thought peanut butter could make a great bread? Sliceable, great texture, and just a mild peanutty flavor. Definitely yummy with all the fixings. In this case, mayo, ham and lettuce. I made the loaf last night and let it firm up in the loaf pan over night. Great stuff.
I got the basic recipe when my son was doing the GAPS protocol for his stomach issues. The original recipe calls for the inclusion of honey, which is legal on that plan. The honey is not necessary, though. Without the sweetener, you have a great bread for sandwiches, something we low carbers really miss.
Here's the how to:
Mr. Peanut Sandwich Bread
1 cup natural peanut butter, smooth
3 eggs
1 Tablespoon vinegar
1/2 teaspoon baking soda
1/4 teaspoon salt
1 packet sweetener (optional)
Blend peanut butter and eggs until smooth. Add in remaining ingredients. Pour into a sprayed loaf pan and smooth the top. Bake at 350 degrees for 30-40 minutes. Let cool before slicing.
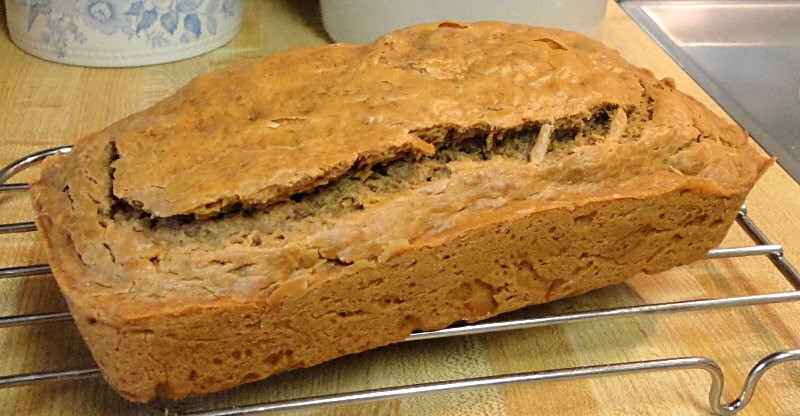
The texture of this loaf is fantastic. It is not dense like many coconut flour breads. It is springy, yet sturdy enough to hold together well for sandwiches. If you don't mind a slight nutty flavor, this will be a go to recipe. It can be made into muffins too. Just think, a great bread with no specialty ingredients or time consuming methods.
LISA'S MR. PEANUT SANDWICH BREAD
You can find the recipe at the 24/7 Low Carb Diner blog. You can also find it on page 259 of the "Low-Carbing Among Friends - Vol.1" cookbook.
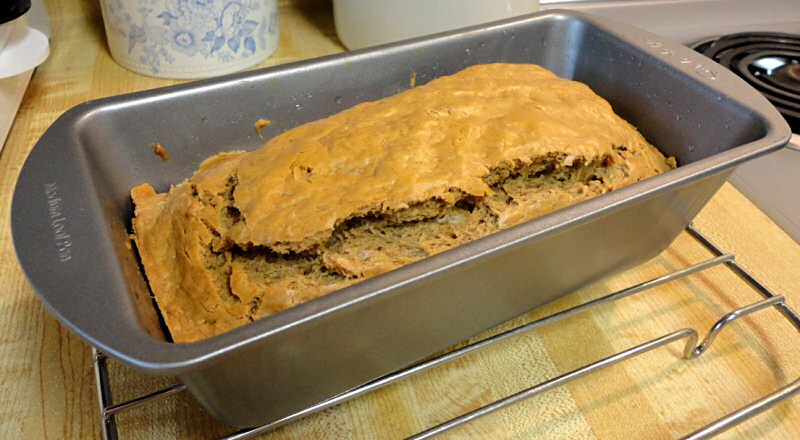
The directions don't say if you need to use an electric mixer, whisk or a spoon to make the batter. I used a wooden spoon and that worked perfectly. The recipe says to "pour" the batter into the loaf pan but "spread" would be a better word. The batter is as thick as peanut butter and is not pourable. I didn't know how to tell when the bread was done baking since this wasn't mentioned in the directions. The directions also don't say if the loaf should be removed from the pan before cooling or cooled completely in the pan. I baked mine for 25 minutes and then checked it. It looked done but I thought I'd better at least leave it in for the minimum of 30 minutes as directed. I let mine cool in the pan on a rack for 10 minutes before removing it. I used a nonstick loaf pan and it came out very easily. This was very simple and quick to mix up and throw into the oven.
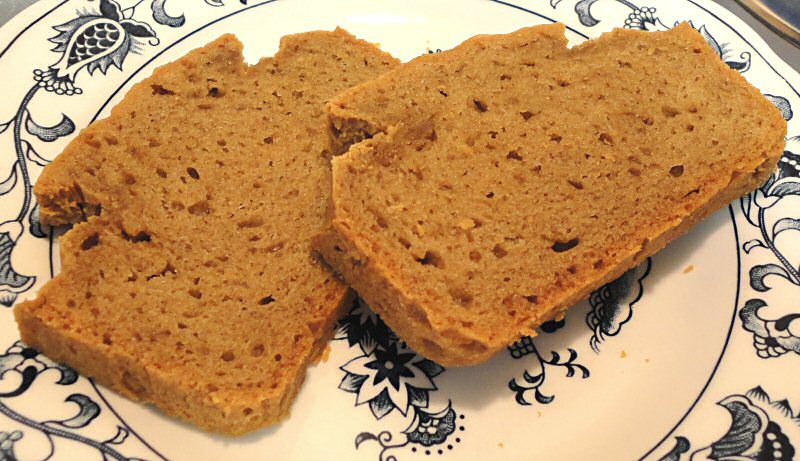
The texture of the bread is very dense but soft and somewhat pliable. I thought it would have the consistency of a quick bread but it's more like the dense German sour dough rye bread that I used to eat at my Grandma's house years ago. I bet if you added some caraway seeds, this would make a fair substitution for rye bread. This does have a subtle peanut flavor but I think it would work fine with most sandwich fillings (I didn't add the optional sweetener to mine). I didn't have any cold cuts on hand so I spread a piece with some butter and LC-Foods blackberry preserves. It almost tasted like a peanut butter and jelly sandwich. Although the slices are very small, just one is very filling. I toasted a slice in my toaster oven to see what would happen. Because the bread is so moist, it took quite a while to get it toasted but it gave it a crunchy texture that was kind of interesting.
I was a little suprised to see how much peanut butter it took to make a cup. Luckily I had a new jar because it used nearly the whole thing. I estimate that a loaf of this bread costs about $1.80-$2.00 to make depending on the brand of peanut butter that you buy. I used Kroger brand and just happened to get it free with a coupon so this loaf cost me next to nothing. Click the photos to see close-ups.
Per Slice: 108 Calories; 9g Fat; 5g Protein; 3g Carbohydrate; 1g Dietary Fiber; 2g Net Carbs

No comments:
Post a Comment
Note: Only a member of this blog may post a comment.